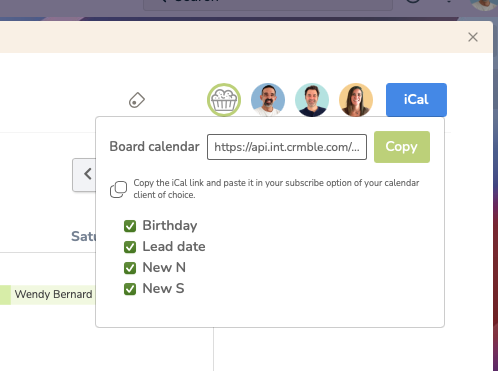

The first thing you need to check is if your Calendar client offers the option to subscribe to other calendars using an internet link (URL). Normally every major Calendar client or service does like Apple Calendar, Microsoft Outlook, Google, Android, etc… Once we found the option in configuration or settings, all we need to do is head to Crmble’s Calendar section and click on the iCal button in the top right corner.
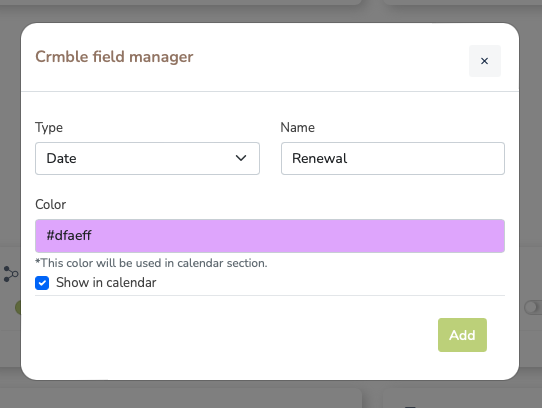
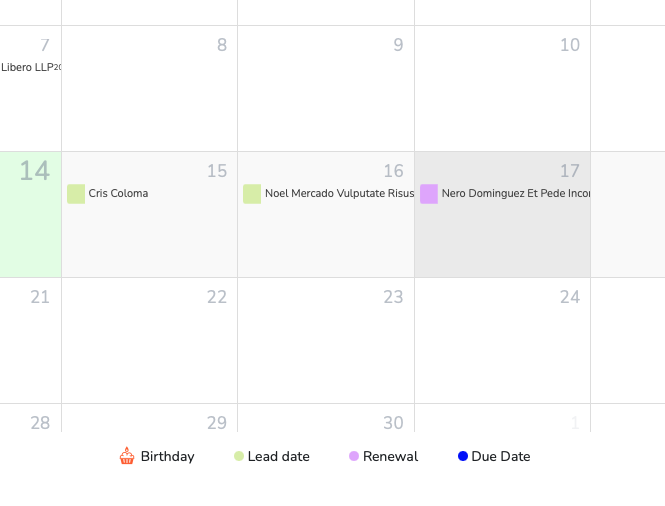
There we can select the dates we would like to publish. Now just copy the URL and paste it into the available field in your calendar client. Once you do, your calendar will be populated with all the Crmble dates. You can change the settings on your calendar client for notification on events and all-day events.
Please note that the Crmble Calendar works on a Trello board level, meaning that each iCal URL will publish the date fields of the leads or contact date fields linked to the leads of the board you created the link from.
Subscribing via an iCal link will let you check, but not edit events on your third party calendar app or service
The easiest way to get notifications on all your Apple devices is by using the iCloud Calendar feature. If you use the same iCloud account on multiple devices, just by subscribing to the Crmble Calendar using macOS’s calendar desktop app, iCloud will do the rest.
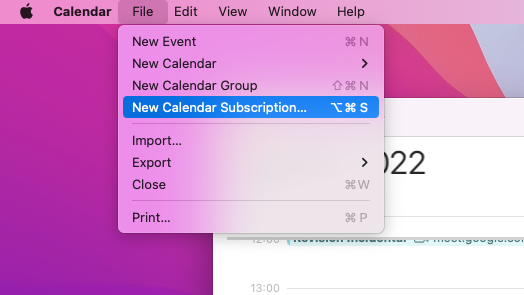
2. Now just open your macOS Calendar app and select the “New Calendar Subscription” option you’ll find in the file menu.
3. Now head back to your Crmble board and open the Calendar section. In the top right corner, you’ll see the iCal button. Click on it to select the dates you want to publish, and copy the URL.
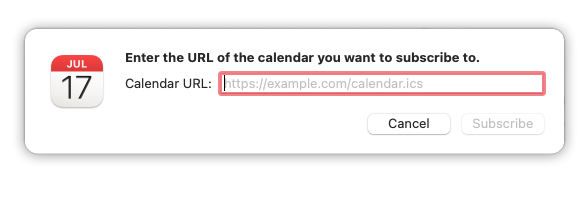
4. Go back to the calendar app and paste your iCal URL and hit subscribe.
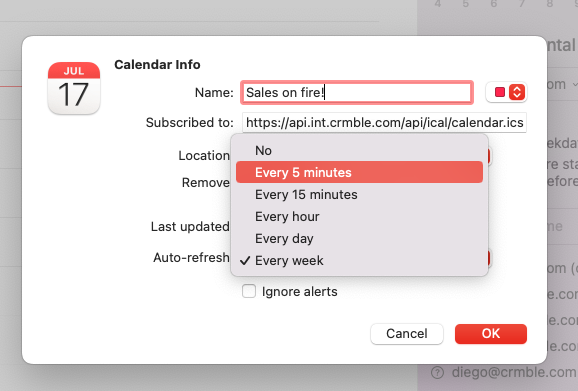
5. Then just pick a name that relates to your board and configure the auto-refresh time.
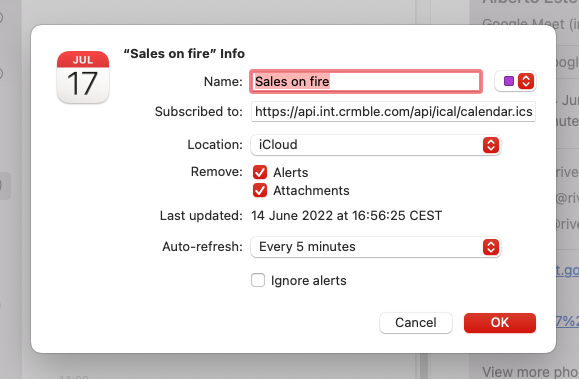
6. Make sure to select “iCloud” in the location setting so that the Crmble Calendar subscription gets available in every device where you are using your iCloud account.
That’s all! Now you have a new Calendar in your iCloud calendars lists to see your Crmble dates and get notifications on all the devices that share your same iCloud address.
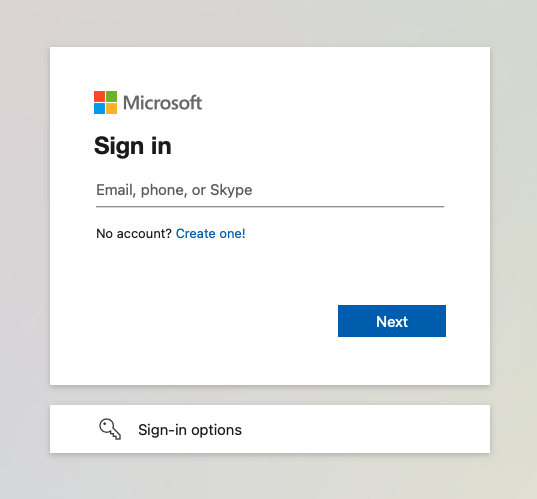
Whether you are using a Microsoft Outlook.com, hotmail.com, live.com, or msn.com account, all of them include access to the online Outlook service with a calendar. The calendar service allows subscribing to an iCal URL and so adding your Crmble Calendar is super easy. Once you configure your Calendar subscription in the online calendar, you will have the calendar automatically added to all the devices where you are logged in with your Microsoft email account and the calendar activated.
Let’s learn how to set it up…
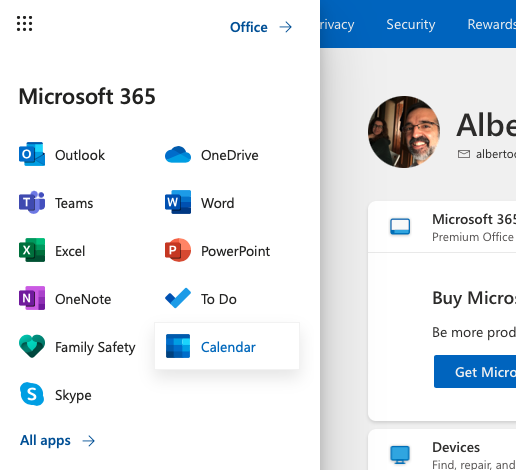
2. Once logged in head to the calendar app using the top left app launcher.
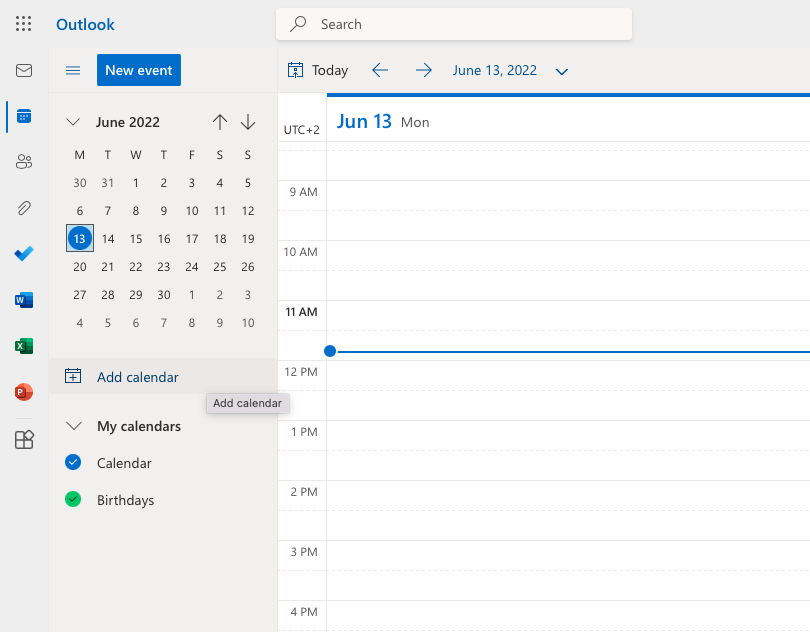
3. Then click on the “+ add Calendar” button you’ll find in the left column.
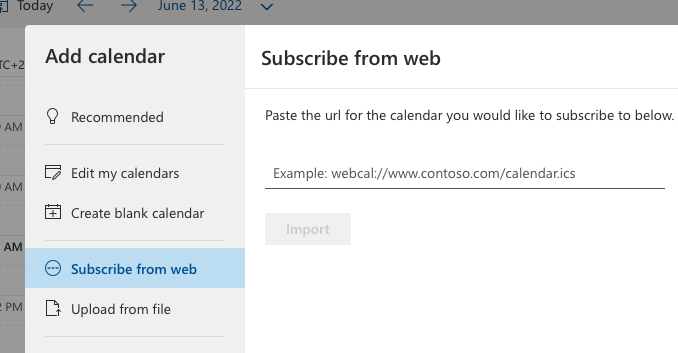
4. Then click on the “Subscribe from the Web” option available.
5. Head back to your Crmble-powered Trello board and open the Calendar section to copy the iCal link and paste it in the “Subscribe from web” field in Outlook.
Now you can name your Calendar, give it a color and a fancy icon. That’s all, your Crmble Calendar is now included in any Calendar client where you are logged in with your Microsoft account.
For more info on how to subscribe to Microsoft calendars, please visit Microsoft support page.
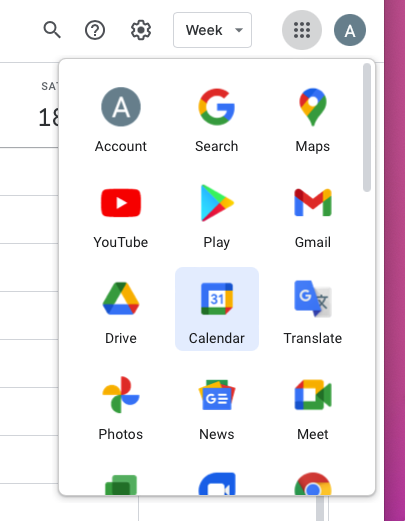
Subscribing to your Crmble calendar using Google Calendar is as easy as logging into Google account and heading to the Calendar app via the apps launcher icon.
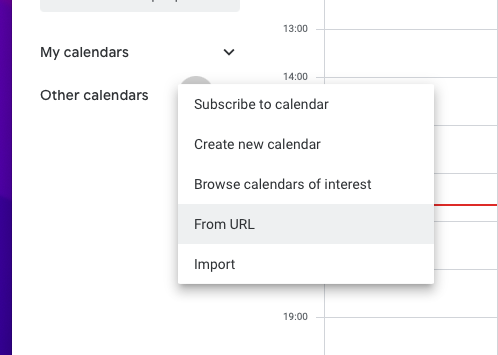
1. Then head to the bottom of the left column and click on the “+” symbol next to the Other calendar section. In the menu select the “From URL” option and paste your Crmble Calendar iCal URL which is available in the upper right corner of Crmble’s Calendar section.
So easy! Just one step and you are good to go.
To see Crmble Calendars events on your Android devices, make sure you subscribe to your Crmble board calendar of choice following the Google Calendar instructions on the Google account you use on your Android device.
To configure additional Google accounts in your Android device:
| Cookie | Duration | Description |
|---|---|---|
| checkForPermission | 10 minutes | This cookie is set by the provider bidr.io. This cookie is used for determining whether the user has accepted the cookie consent box. |
| cookielawinfo-checkbox-advertisement | 1 year | Set by the GDPR Cookie Consent plugin, this cookie is used to record the user consent for the cookies in the "Advertisement" category . |
| cookielawinfo-checkbox-analytics | 11 months | This cookie is set by GDPR Cookie Consent plugin. The cookie is used to store the user consent for the cookies in the category "Analytics". |
| cookielawinfo-checkbox-functional | 11 months | The cookie is set by GDPR cookie consent to record the user consent for the cookies in the category "Functional". |
| cookielawinfo-checkbox-necessary | 11 months | This cookie is set by GDPR Cookie Consent plugin. The cookies is used to store the user consent for the cookies in the category "Necessary". |
| cookielawinfo-checkbox-others | 11 months | This cookie is set by GDPR Cookie Consent plugin. The cookie is used to store the user consent for the cookies in the category "Other. |
| cookielawinfo-checkbox-performance | 11 months | This cookie is set by GDPR Cookie Consent plugin. The cookie is used to store the user consent for the cookies in the category "Performance". |
| elementor | never | This cookie is used by the website's WordPress theme. It allows the website owner to implement or change the website's content in real-time. |
| intercom-id-u744lt6w | 8 months 26 days 1 hour | Anonymous visitor identifier cookie. As people visit your site they get this cookie. |
| intercom-session-u744lt6w | 7 days | Identifier for each unique browser session. This session cookies is refreshed on each successful logged-in ping, extending I to 1 week from that moment. The user can access their conversation and have data communicated on logged out pages for 1 week, as long as the session isn’t intentionally terminated with ‘intercom(‘shutdown’)´;, which usually happens on logout. |
| viewed_cookie_policy | 11 months | The cookie is set by the GDPR Cookie Consent plugin and is used to store whether or not user has consented to the use of cookies. It does not store any personal data. |
| Cookie | Duration | Description |
|---|---|---|
| __cf_bm | 30 minutes | This cookie, set by Cloudflare, is used to support Cloudflare Bot Management. |
| bcookie | 2 years | LinkedIn sets this cookie from LinkedIn share buttons and ad tags to recognize browser ID. |
| lang | session | This cookie is used to store the language preferences of a user to serve up content in that stored language the next time user visit the website. |
| lidc | 1 day | LinkedIn sets the lidc cookie to facilitate data center selection. |
| wordpress_google_apps_login | session | This is a functional cookie used for WordPress.This cookie allows the users to login to the site with their Google account. |
| Cookie | Duration | Description |
|---|---|---|
| _gat_UA-159914689-1 | 1 minute | A variation of the _gat cookie set by Google Analytics and Google Tag Manager to allow website owners to track visitor behaviour and measure site performance. The pattern element in the name contains the unique identity number of the account or website it relates to. |
| Cookie | Duration | Description |
|---|---|---|
| _ga | 2 years | The _ga cookie, installed by Google Analytics, calculates visitor, session and campaign data and also keeps track of site usage for the site's analytics report. The cookie stores information anonymously and assigns a randomly generated number to recognize unique visitors. |
| _gid | 1 day | Installed by Google Analytics, _gid cookie stores information on how visitors use a website, while also creating an analytics report of the website's performance. Some of the data that are collected include the number of visitors, their source, and the pages they visit anonymously. |
| _uetsid | never | This cookies are used to collect analytical information about how visitors use the website. This information is used to compile report and improve site. |
| ajs_anonymous_id | never | This cookie is set by Segment.io to check the number of ew and returning visitors to the website. |
| CONSENT | 2 years | YouTube sets this cookie via embedded youtube-videos and registers anonymous statistical data. |
| Cookie | Duration | Description |
|---|---|---|
| _fbp | 3 months | This cookie is set by Facebook to display advertisements when either on Facebook or on a digital platform powered by Facebook advertising, after visiting the website. |
| bscookie | 2 years | This cookie is a browser ID cookie set by Linked share Buttons and ad tags. |
| fr | 3 months | Facebook sets this cookie to show relevant advertisements to users by tracking user behaviour across the web, on sites that have Facebook pixel or Facebook social plugin. |
| IDE | 1 year 24 days | Google DoubleClick IDE cookies are used to store information about how the user uses the website to present them with relevant ads and according to the user profile. |
| MUID | 1 year 24 days | Bing sets this cookie to recognize unique web browsers visiting Microsoft sites. This cookie is used for advertising, site analytics, and other operations. |
| personalization_id | 2 years | Twitter sets this cookie to integrate and share features for social media and also store information about how the user uses the website, for tracking and targeting. |
| test_cookie | 15 minutes | The test_cookie is set by doubleclick.net and is used to determine if the user's browser supports cookies. |
| VISITOR_INFO1_LIVE | 5 months 27 days | A cookie set by YouTube to measure bandwidth that determines whether the user gets the new or old player interface. |
| YSC | session | YSC cookie is set by Youtube and is used to track the views of embedded videos on Youtube pages. |
| yt-remote-connected-devices | never | YouTube sets this cookie to store the video preferences of the user using embedded YouTube video. |
| yt-remote-device-id | never | YouTube sets this cookie to store the video preferences of the user using embedded YouTube video. |
| Cookie | Duration | Description |
|---|---|---|
| _uetvid | never | No description available. |
| AnalyticsSyncHistory | 1 month | No description |
| attribution_user_id | 1 year | This cookie is set by the provider Typeform. This cookie is used for Typeform usage statistics. It is used in context with the website's pop-up questionnaires and messengering. |
| currentAccountId | past | No description |
| debug | never | No description available. |
| dsc | 3 days | No description available. |
| mab | 1 month | No description available. |
| mng517 | 1 hour 10 minutes | No description |
| preAuthProps | session | No description |
| UserMatchHistory | 1 month | Linkedin - Used to track visitors on multiple websites, in order to present relevant advertisement based on the visitor's preferences. |
| zapforeversession | 1 year | No description |
| zapidentity | 1 year | No description |
| zapsession | 7 days | No description |